You have probably already heard of Rubber Ducky or BadUSB. The idea behind this stuff is to drop a harmless looking USB Stick at a company or public location. These USB Sticks implement a keyboard which inputs malicious commands into the computer whenever it is attached. The keyboard sends hotkeys to start a shell and run some payload or upload sensitive information like SSH keys to the attackers servers.
Avoiding to plug in third party USB Sticks into your computer is a commonly known security precaution. But there are much more devices which are connected everyday and don’t look that evil. Just think about your desk where you probably attach your laptop to a dock to connect your keyboard, mouse and monitor.
I got this idea from an attendee of the first Security Barcamp in Cologne in 2019. He built a mouse containing a rubber ducky which sent some commands. I kinda liked this idea and wanted to build my own let’s call it kyeouse.
Build your own
You need just a few parts to build your own keyouse. This section will describe each required step.
USB Mouse
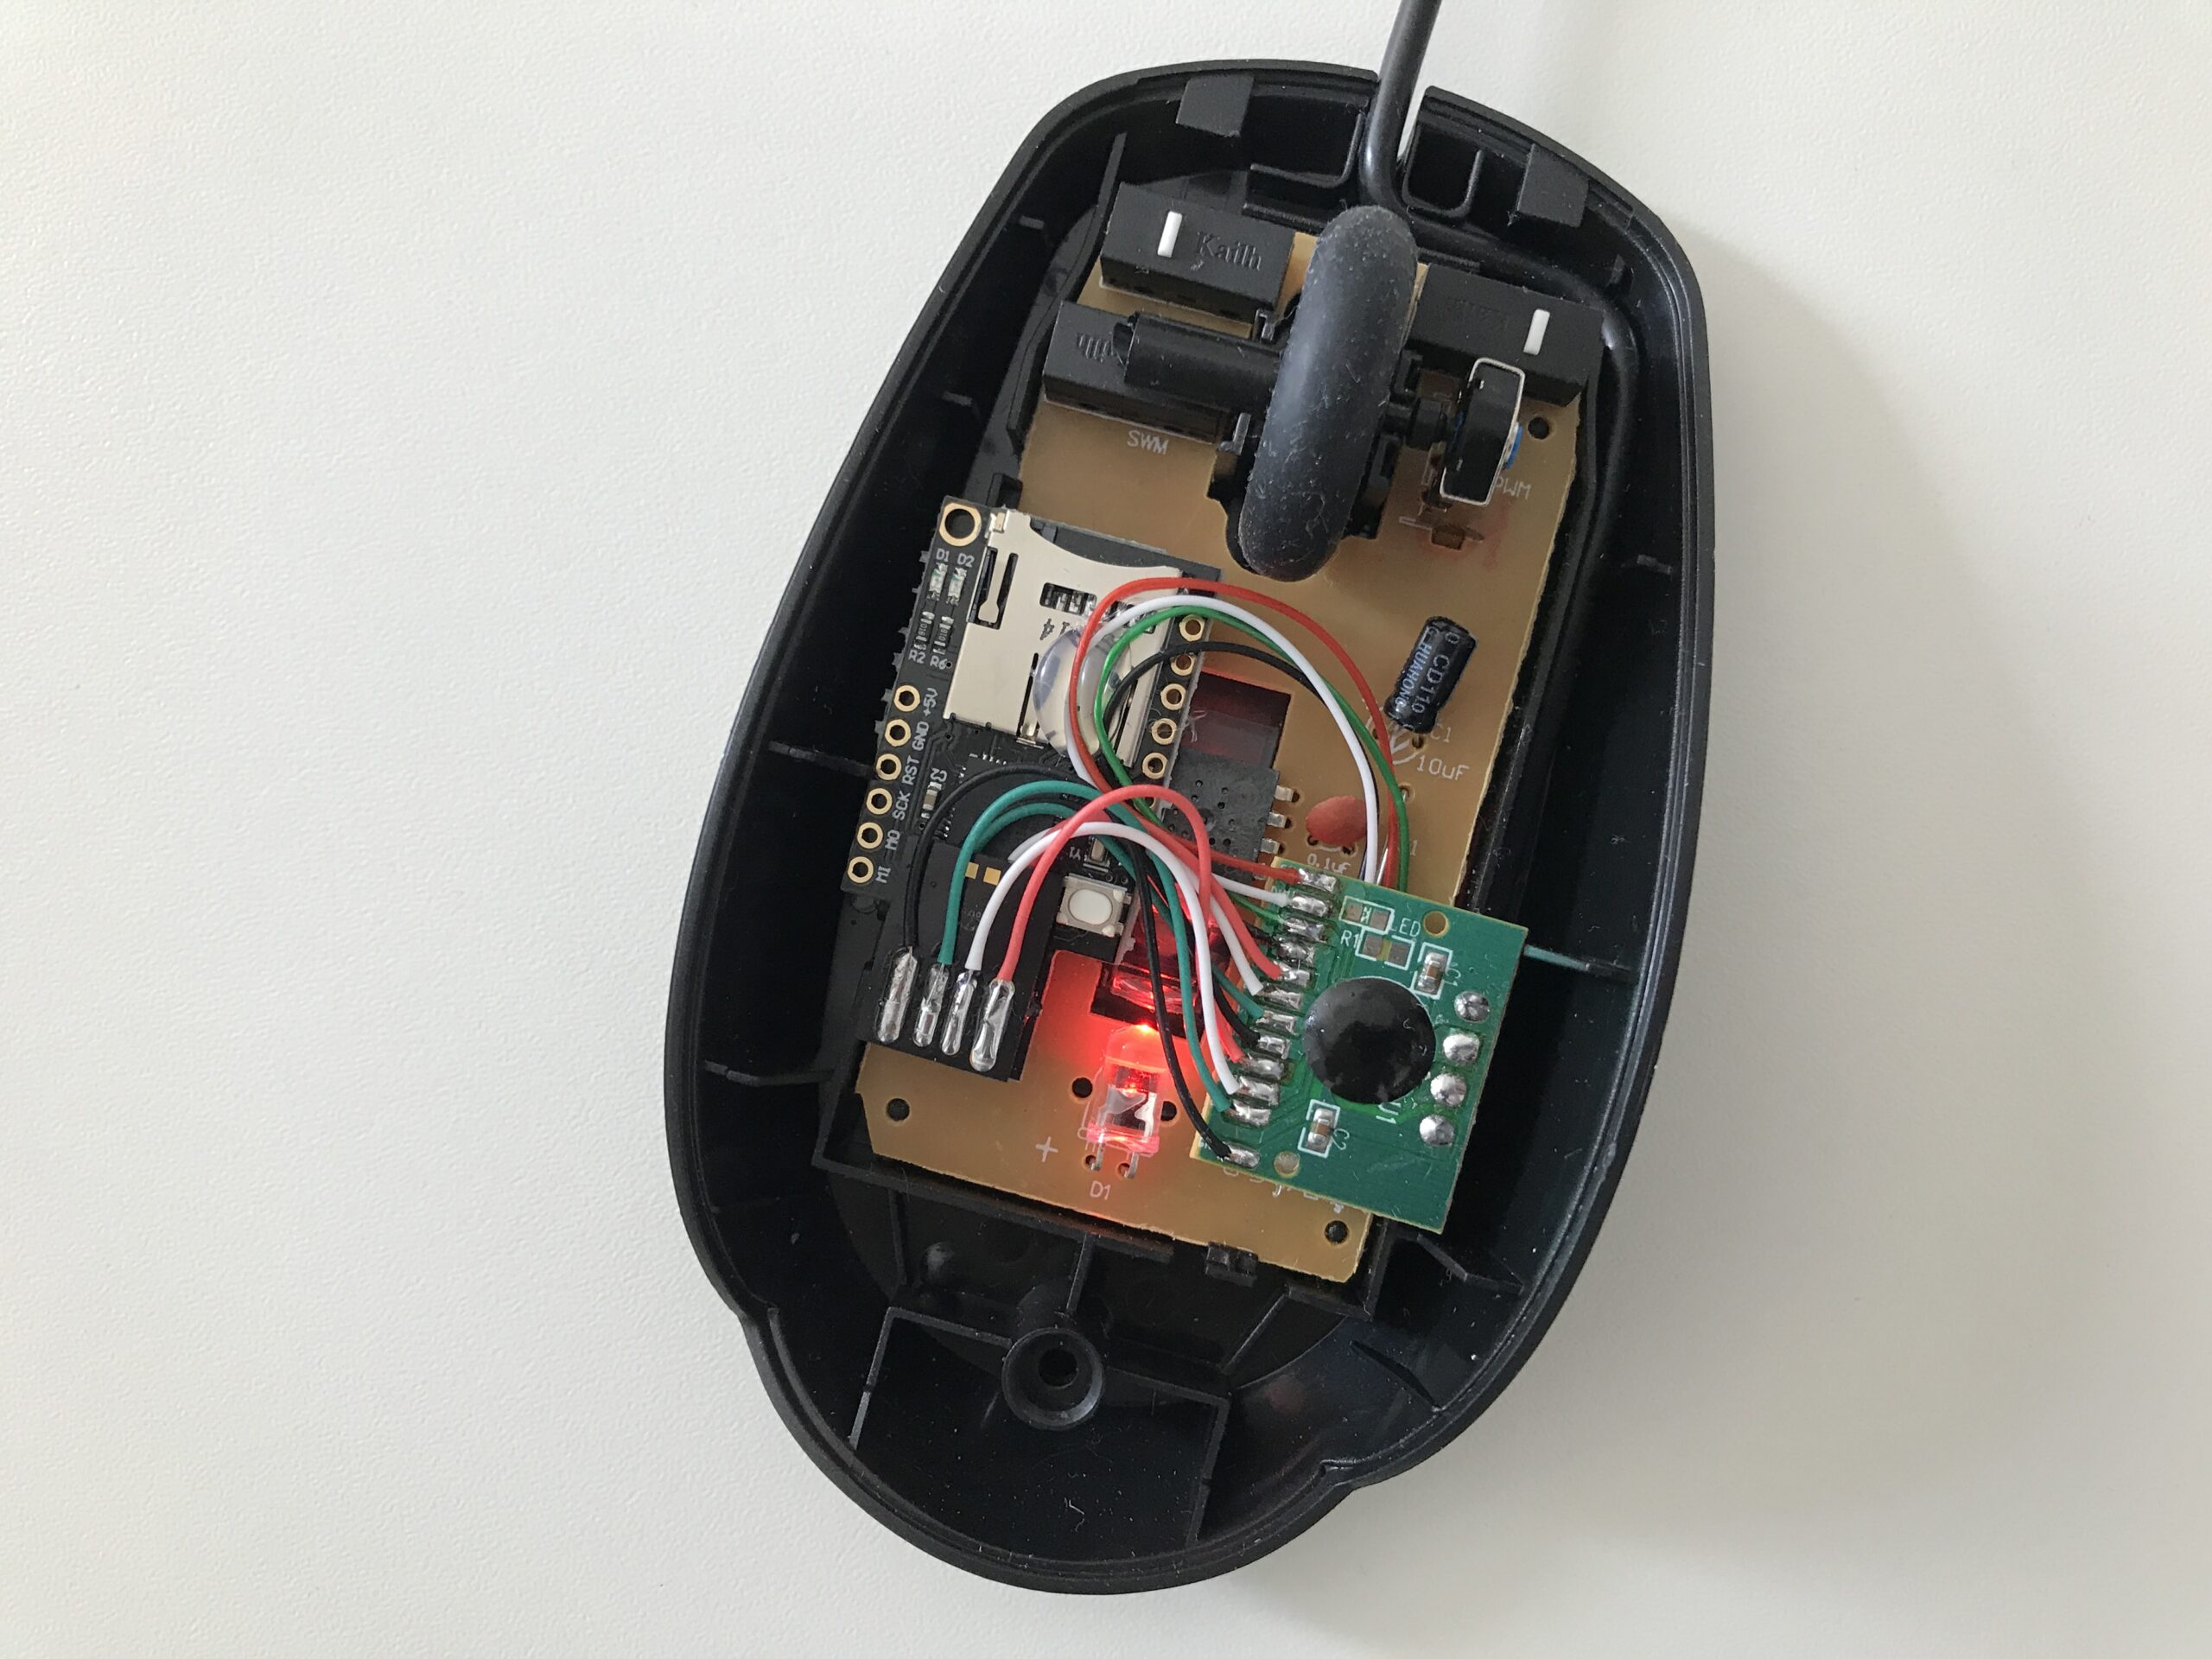
Purchase a cheap USB Mouse. Make sure to use a normal sized mouse. There is plenty of space inside. Most mouses don’t have visible screws. They are hidden under stickers which are normally used to ensure a smooth gliding. You will have to remove these stickers carefully as you have to stick them back again later.
USB Hub
Of course we want to make sure that the mouse is still working after the modification. This is why I used a hub to connect the rubber ducky and the mouse at the same time.
There are very small OTG Hubs out there which are normally used for smartphones. OTG Hubs have one more pin than normal USB devices but you can leave this pin unconnected. I bought a cheap two port USB Hub from Aliexpress.
After opening the housing of this hub I unsoldered the incoming cable and replaced it with the long USB cable of the mouse and connected it to these pins. The mouse should be working again.
Rubber Ducky
Of course you could use the original rubber ducky for this part but they are quite expensive and contain a real USB plug. You can buy much cheaper clones based on ATmega 32U4 which don’t have a real USB plug. Instead they consist of a thicker PCB which has the USB contacts already on it and fits into the computers USB Port.
You can directly solder cables to these pads without the need to remove the Jack. Connect the Rubber Ducky to the hub as well. Now you should have a working mouse and a programmable keyboard. You could glue everything in place or continue to the next part.
USB Stick
Did I say I used a two port USB hub? Yes! I purchased a two port hub but after opening this hub it became clear that the hub had a third unused port which was fully working. When purchasing the Rubbery Ducky clone I was a bit unlucky and the SD Card reader broke after a few removals. This is why I decided to put a USB Stick inside the mouse. The Rubber Ducky does only invoke a script stored on the USB Stick which can contain bigger payload.
You can purchase many mini USB thumb drives. They come inside a normal USB Jack which is the housing at the same time. The drive itself is just a chip which has the USB contacts on it’s upper side. It can be removed from the surrounding jack by bending the two metal noses in front of it away and shake it out.
I glued it on top of the Rubber Ducky clone and connected it to the third port of the USB hub.
Software
The software is pretty much a hello world sending a few keystrokes. There are easy to use Arduino examples available. It basically consists of sending Windows + R, D:\run.bat and ENTER. Note that the libraries expect to emulate a US keyboard. If you expect a German keyboard you would need to replace some characters to match the layout.
Advantages
Using a USB Stick has some advantages and disadvantages First of all you can easily replace the payload by changing the files on the thumb drive. This is perfect for demonstration purposes as you don’t need to open the mouse again. The USB Stick can already contain the payload. Thus no download is required and the demonstration works without an internet connection. Furthermore the typed command line becomes much shorter which makes it harder to see or interrupt the commands typed by the “keyboard”.
On the other hand using an USB drive causes some problems. On Windows you can’t mount a drive by its UUID. Thus you don’t know the exact drive letter you will need to enter. This issue can be easily circumvented by calling multiple locations like this:
D:\run.bat;E:\run.bat;F:\run.bat
Running an executable from the USB Stick requires good timing. If the keyboard starts the input too fast the drive may not already be mounted. Waiting too long increases the risk of detection. Additionally a virus protection may remove the payload. But that’s a different topic.
Another problem may be restricted environments where USB ports have been disabled. In this case the attack would not succeed.
Last but not least this attack is keyboard layout dependent. If you expect your victim to use a German layout but it is actually a US version the attack won’t work. Thus you need some general information about your target. Keep in mind that servers may have been configured for US Layout while office PCs use a German Layout. If you expect multiple layouts you may send your command multiple times to increase the chance to succeed. Unfortunately this increases the risk of being detected.